The Terracotta Pot Heater: A DIY Guide for Cozy Emergencies
As the chill of winter creeps in, or if you're prepping for those unexpected power outages, I've been diving into clever, low-tech ways to stay warm.
Today, we're talking about the terracotta pot heater, a viral DIY hack that's been buzzing around online for years.
It's simple, cheap, and uses everyday items like clay pots and candles to create a bit of warmth.
But does it live up to the hype?
I'll break down what it is, the science behind why it "works" (with some caveats), and a step-by-step guide to building one safely.
ON SURVIVAL is a reader-supported publication. To receive new posts and support my work, consider becoming a free or paid subscriber.
What Is a Terracotta Pot Heater?
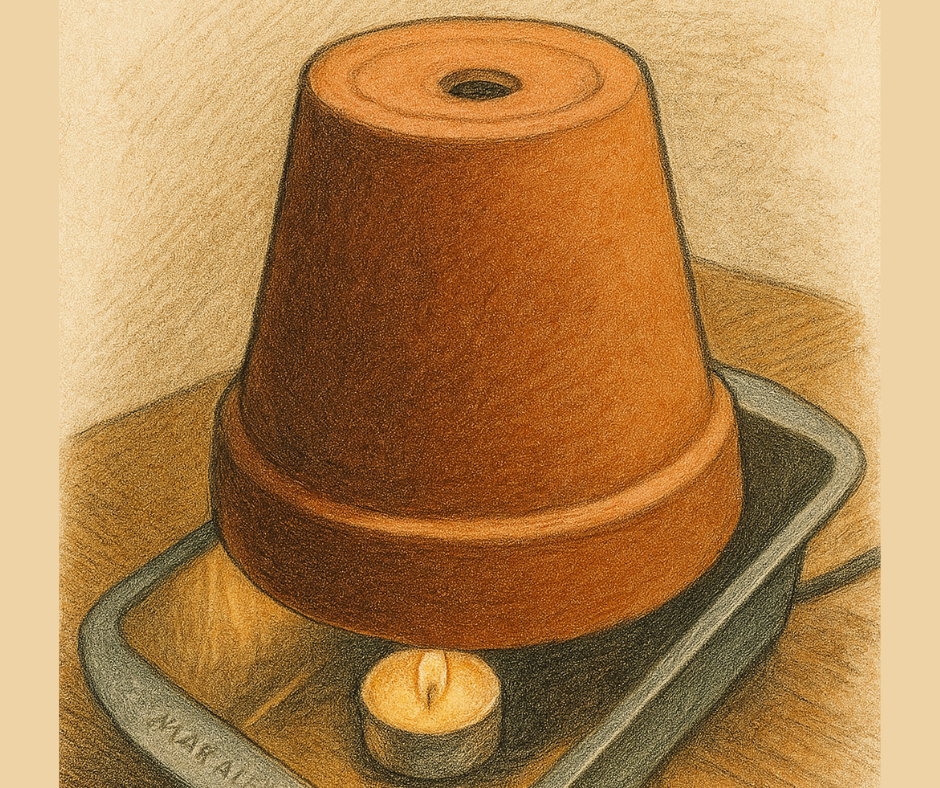
At its core, a terracotta pot heater is a homemade radiant heater made from unglazed clay flower pots, a heat source like tea light candles or canned heat, and a few basic supports.
The idea originated from survivalists and frugal DIYers looking for off-grid heating solutions, and it's gained traction on platforms like TikTok and YouTube for its supposed ability to warm small spaces without electricity.
The basic setup involves placing candles or a small flame under inverted terracotta pots.
The pots absorb the heat from the flames and slowly release it into the surrounding air, creating a localized warm spot.
Variations include stacking multiple pots of different sizes (like Russian dolls) or adding a fan for better air circulation.
It's not a new invention—similar concepts have been used in greenhouses or campers for spot heating—but it's exploded in popularity during energy crises, with some folks claiming it can "heat a whole room" for pennies.
Think of it as a mini radiator: the clay acts as a thermal mass, storing and radiating heat rather than letting it dissipate quickly like an open flame would.
It's versatile too—some designs double as emergency cookers for boiling water or warming food.
Why Does It Work So Well? (The Science, Myths, and Reality)
The appeal of the terracotta pot heater lies in its simplicity and the promise of efficient heating.
But let's get real: while it does provide some warmth, it's not the miracle room-heater it's often hyped to be.
Here's the breakdown, backed by thermodynamics and real-world testing.
The Claims and How It "Works"
Proponents say it works by harnessing convection and radiation. The candles produce heat (about 30-80 watts per tea light, or roughly 100-270 BTU/hour total for a few candles).
The flame heats the air inside the pots, which rises and creates a convection current—warm air flows out, pulling in cooler air from below. The terracotta, being porous and dense, absorbs this heat like a battery and radiates it outward slowly, even after the candles burn out.
In small, insulated spaces (like a tent, greenhouse, or tiny room), this can raise the temperature by a few degrees locally, taking the edge off frost.
It's why some users report feeling cozy when sitting right next to it— the radiant heat feels like a personal warmer.
Plus, it's cheap: a setup might cost $10-20, and fuel (candles or canned heat) runs pennies per hour.
The Science: Why It's Effective (But Limited)
Terracotta's thermal mass is key—it stores heat and releases it gradually, which is more efficient for spot heating than candles alone, where heat rises straight to the ceiling.
This is basic physics: clay has high specific heat capacity, meaning it takes time to warm up but holds onto that energy.
However, the first law of thermodynamics kicks in here—you can't create energy out of nothing. The total heat output is limited to what the candles provide; the pots just redistribute it.
Scientific analyses show it won't heat an entire room effectively, especially in drafts or larger spaces—it's more like a hand warmer than a furnace.
One expert notes that to match a small electric heater (1,500 watts), you'd need dozens of candles, which is impractical and dangerous.
In tests, it might raise temps by 2-3°C in a tiny area, but myths about "heating whole rooms" are debunked.
It "works well" for emergencies or as a supplement, but don't ditch your real heater.
Pros and Cons
- Pros: Low-cost, no electricity, portable, dual-use for cooking.
- Cons: Limited heat, fire/CO risks, inefficient for big areas.
How to Build Your Own Terracotta Pot Heater
Ready to try it?
I'll share a simple, safe version using candles, plus a variation with a fan for better airflow.
Always build on a non-flammable surface and test in a ventilated area.
Basic Candle-Powered Version (No Tools Needed)
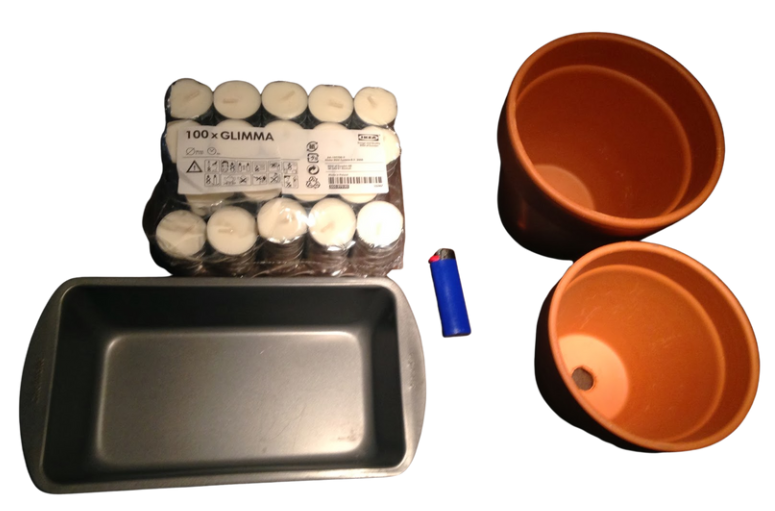
Materials (about $15-20):
- 2-3 terracotta pots of decreasing sizes (e.g., 8", 6", 4" diameter).
- Metal loaf pan or tray (for candle base).
- 4-6 unscented tea light candles (avoid scented to prevent fumes).
- Bricks or metal stands to elevate.
- Foil or a non-flammable cap for pot holes.
Steps:
- Place the loaf pan on a stable, heat-proof surface (like a tile or metal sheet).
- Arrange 4-6 tea lights in the pan and light them.
- Stack bricks or stands around the candles to create a 1-2 inch gap for airflow.
- Invert the smallest pot over the candles, covering its drainage hole with foil to trap heat.
- Place the next larger pot over it, upside down, leaving space between for convection.
- Add the largest pot if using three. Let it heat up for 10-15 minutes—the outer pot should get toasty (around 200°F).
- Sit nearby and enjoy the radiant warmth. Replace candles as needed (they last 4-6 hours each).
For cooking: Place a small pan on top to warm soup or water—stir often to avoid scorching.
Advanced Version with Fan (For Better Heat Distribution)
If you want more circulation, try this Instructables-inspired build.
Materials (add to basic: $10-15 extra):
- Threaded rod, nuts, washers.
- 90-degree metal pipe.
- Small electric fan (like a computer fan, battery-powered for off-grid).
- Drill, hammer, screwdriver.
- Circular clay tray.
Steps:
- Drill a center hole in the clay tray for the rod.
- Fasten the fan to the metal pipe with wire.
- Build a base: Drill a square wood/metal plate, insert rod, secure with nuts.
- Place tray on base, add nuts to hold.
- Drill vent holes in the pot's top for heat flow.
- Hang the pot on the rod, add the pipe/fan on top, ensuring airflow gaps.
- Wire the fan to a battery.
- Light candles under the tray, turn on fan—it pushes warm air out (up to 113°F output).
Tip: Use a metal base to reduce fire risk.
Safety First: Don't Skip This!
This isn't a toy, open flames mean real risks.
Fire departments warn against them due to fire hazards and carbon monoxide buildup.
Always:
- Use in a well-ventilated room with a CO detector.
- Never leave unattended—candles can spill wax and ignite.
- Keep away from kids, pets, and flammables.
- Extinguish by smothering (not blowing out).
- If using canned heat instead of candles, follow indoor-rated guidelines.
Reports of fires from cracked pots or spilled wax underscore the dangers, use at your own risk.
Wrapping Up: Is It Worth It?
The terracotta pot heater is a fun, resourceful hack for emergencies or off-grid adventures, offering localized warmth through smart heat distribution.
It "works well" in the sense that it beats freezing hands, but science shows it's no substitute for proper heating, expect spot warmth, not room-filling coziness.
Build one for fun, but pair it with blankets, insulation, and a backup plan.
Have you tried this?
Share your experiences in the comments.
I'd love to hear!
If you enjoyed this, subscribe for more practical DIY tips.
Stay warm out there!
ON SURVIVAL is a reader-supported publication. To receive new posts and support my work, consider becoming a free or paid subscriber.


Comments ()